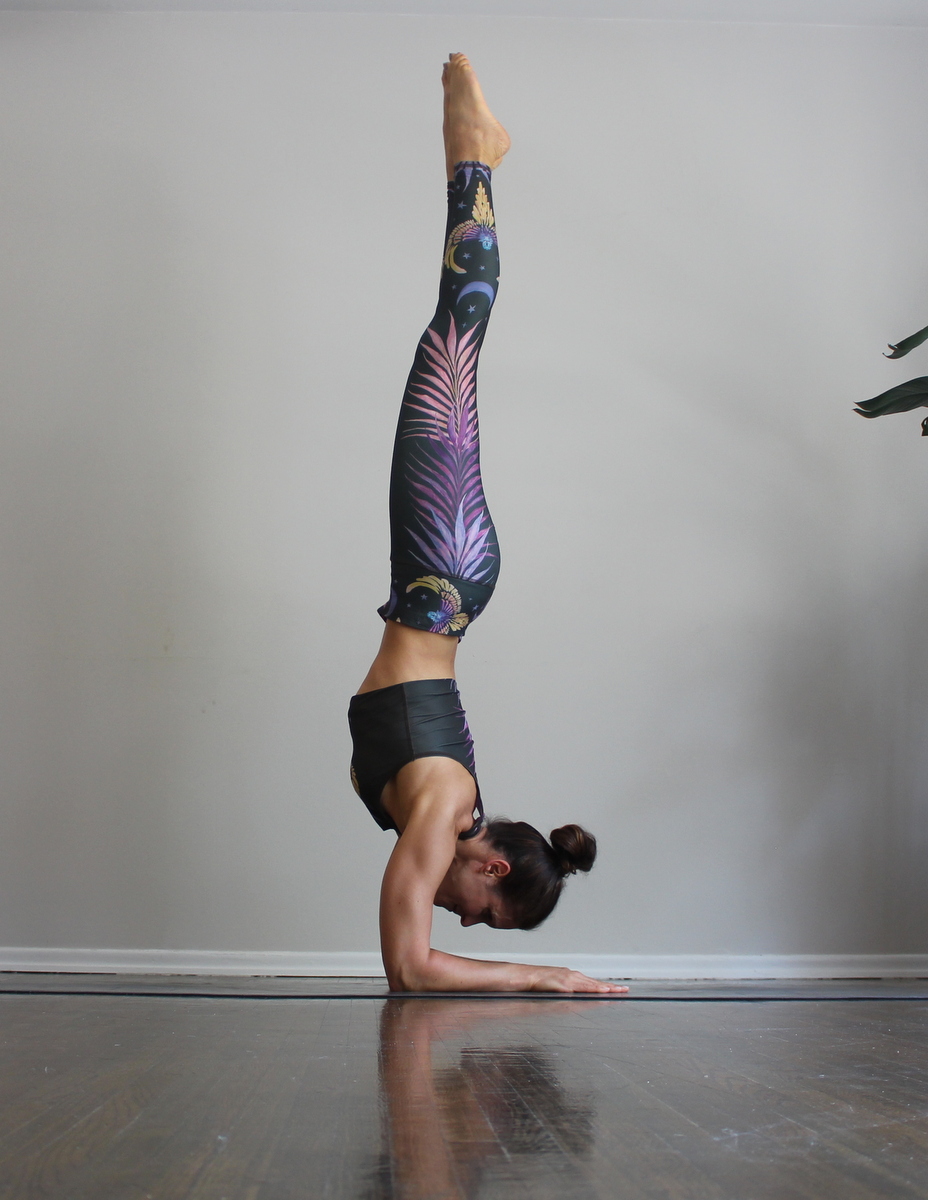
Open Shoulders can help with Proper Alignment in Forearm Stand
So many of us carry tension in our shoulders - whether it’s from sitting at a computer for hours a day, using our smartphones, or even from the way we sleep - the shoulders are one of the most common parts of our body to hold stress. Having stiff shoulders can affect our yoga practice too. Many of the poses we perform are compromised when there is a limited range of motion in the shoulders (such as Forearm Stand).
Shoulder-opening poses are a great way to relieve tension and to help prevent injury in postures that require the shoulders to be more open. Below are 4 of my go-to shoulder-opening postures:
1. Garudasana (Eagle) Arms

Garudasana Arms
While in a comfortably seated position, reach your arms straight forward and parallel to the ground.
Spread your scapula wide as you cross your left arm over your right.
Bend your elbows. Your left elbow should be directly inside of the right one, and the backs of your hands should be facing one other.
Continue to twist the arms so that the palms of the hands are facing one another. Then press the palms together as much as you comfortably can.
Raise your elbows up, reaching the fingertips toward the sky.
Hold for 10 breaths, then release, and repeat on the opposite side for the same length of time.
2. Shoulder Stretch with Blocks
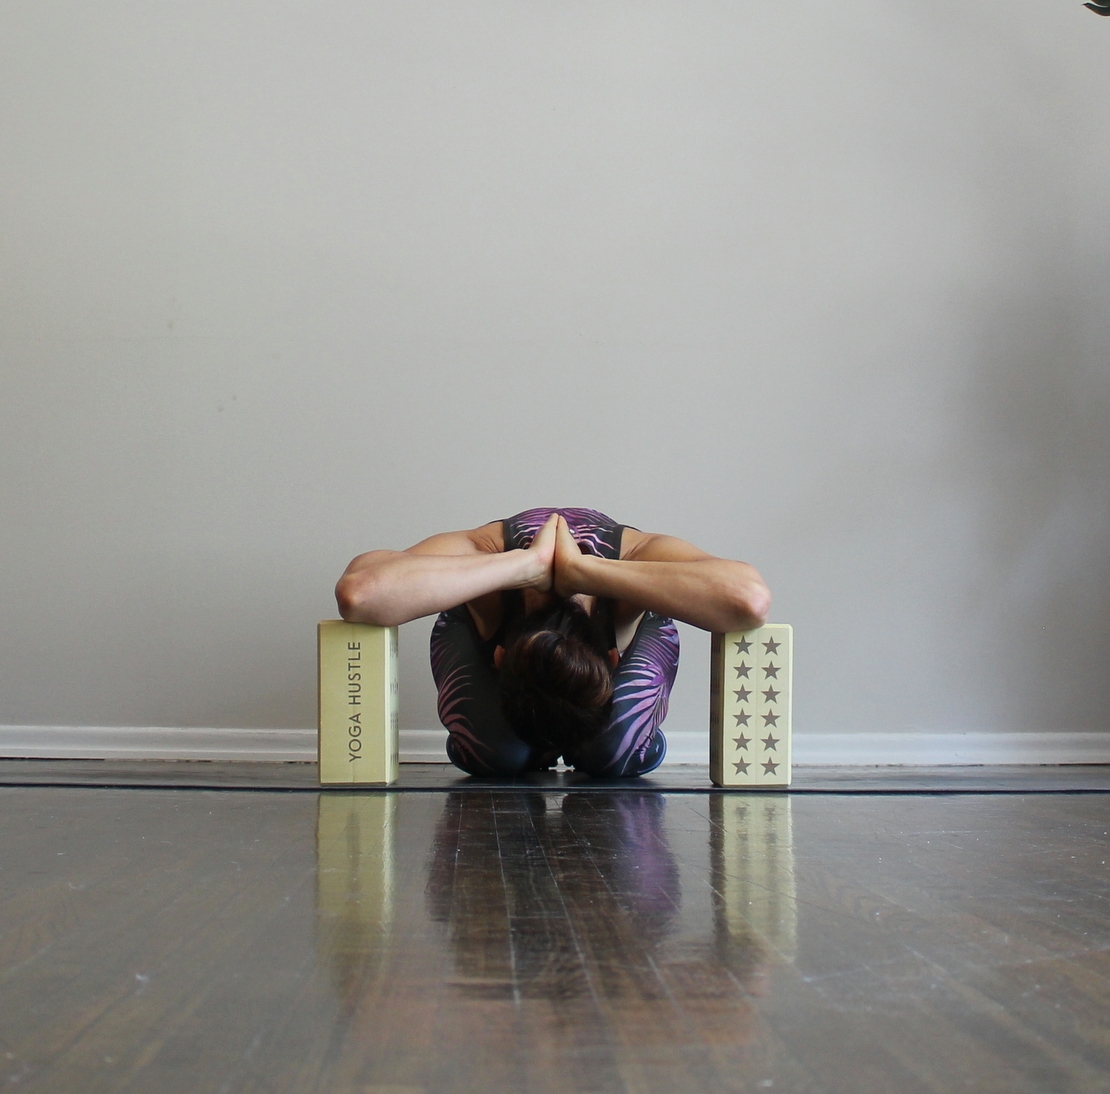
Shoulder Stretch with Blocks
Begin sitting on your shins. Place two blocks, on their highest height, about 6-8 inches on either side of you and slightly in front of you.
Bring your hands to prayer pose behind your head, so that your fingers are pointing down toward the ground. Slowly lean forward until both elbows are resting on the blocks. It's ok if your hips lift up slightly.
Gently lower your head down as you sink your hips back slightly. Make sure to only go as far as feels comfortable for your body.
Hold for 10-15 breaths, then come up to release.
3. Thread the Needle

Thread the Needle
Begin on your hands and knees, with your wrists directly under your shoulders and your knees directly under your hips. Your knees should be hip-width apart.
Slide your left arm under your right arm, with the palm facing up. Allow your left shoulder to lower all the way down to the ground . Rest your left cheek on the mat.
Keep your hips raised. You can extend your right hand toward the front of the mat, or straight up toward the sky. You can gaze upward if that feels comfortable for you as well.
Make sure not press weight onto your head, instead, and keep your lower back relaxed. Allow all of the tension in your shoulders, arms, & neck to malt away.
Hold for 5-8 breaths. Slowly slide your left out out to exit and release. then repeat on the opposite side for the same length of time.
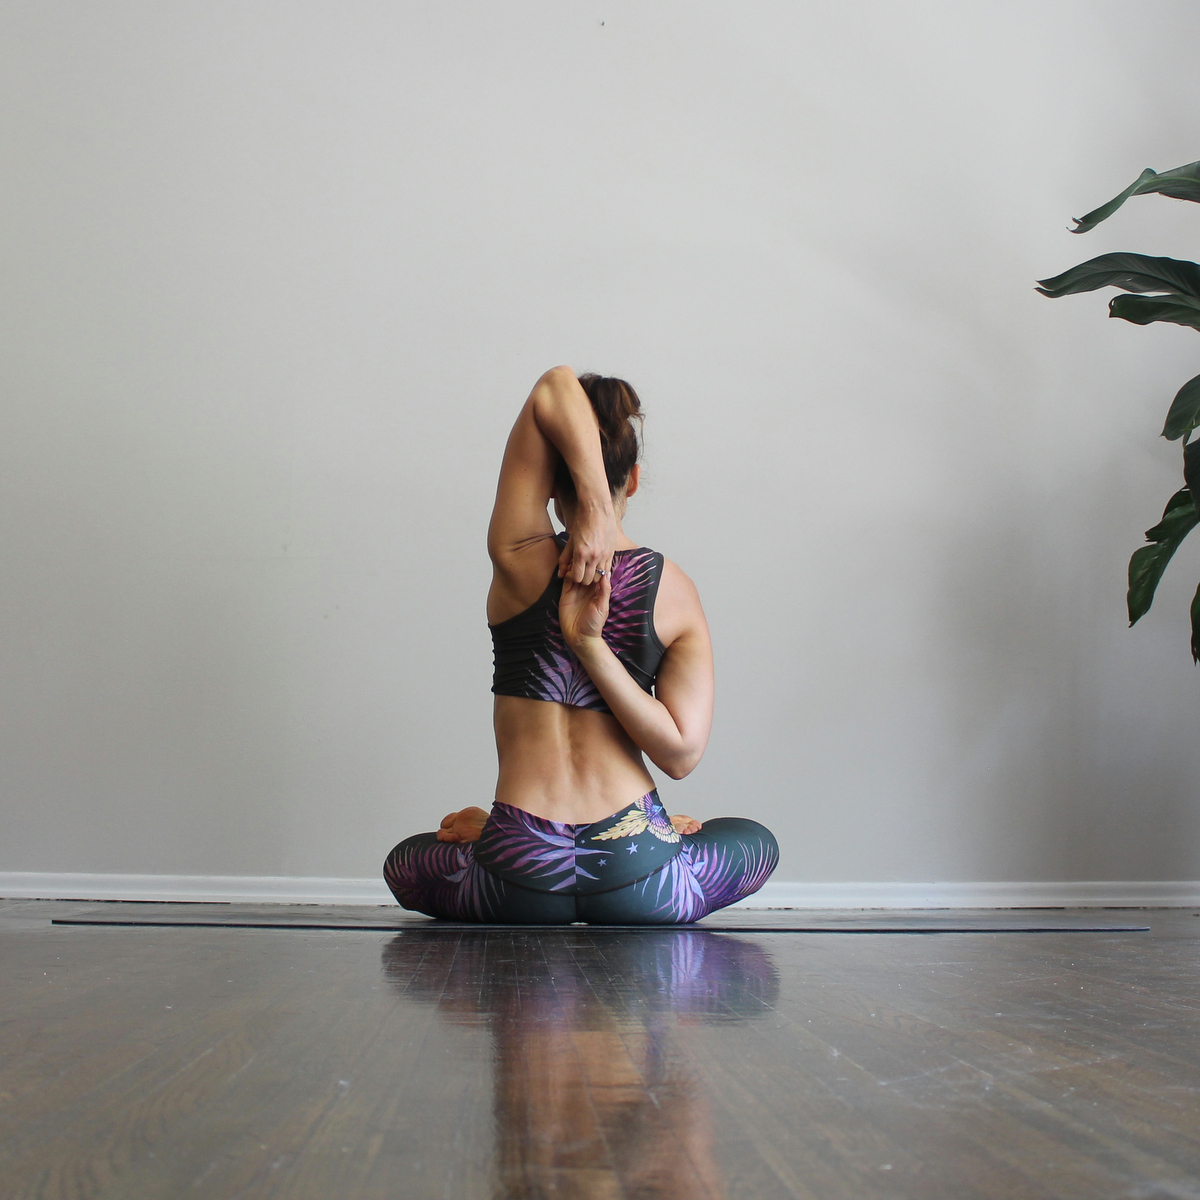
4. Gomukhasana Arms
While n a comfortably seated position, reach your left arm out toward the left so that its parallel to the floor. Rotate your arm inwardly so that your thumb is pointing down.
Gently bend your left arm and place your hand behind your back. Roll your left should down and back, and begin to inch your left hand upward so that its parallel to your spine. Try to get the back of your left hand between your shoulder blades.
Now extend your right arm reaching it up toward the sky. Bend your right elbow and reach your right hand down for the left hand.
If you're unable to hook the right and left fingers, try using a strap so that you can reach.
Try to keep the chest lifted, as you lean back slightly.
Hold for 10-12 breaths, then slowly release and repeat on the opposite side for the same length of time.
Gomukhasana Arms
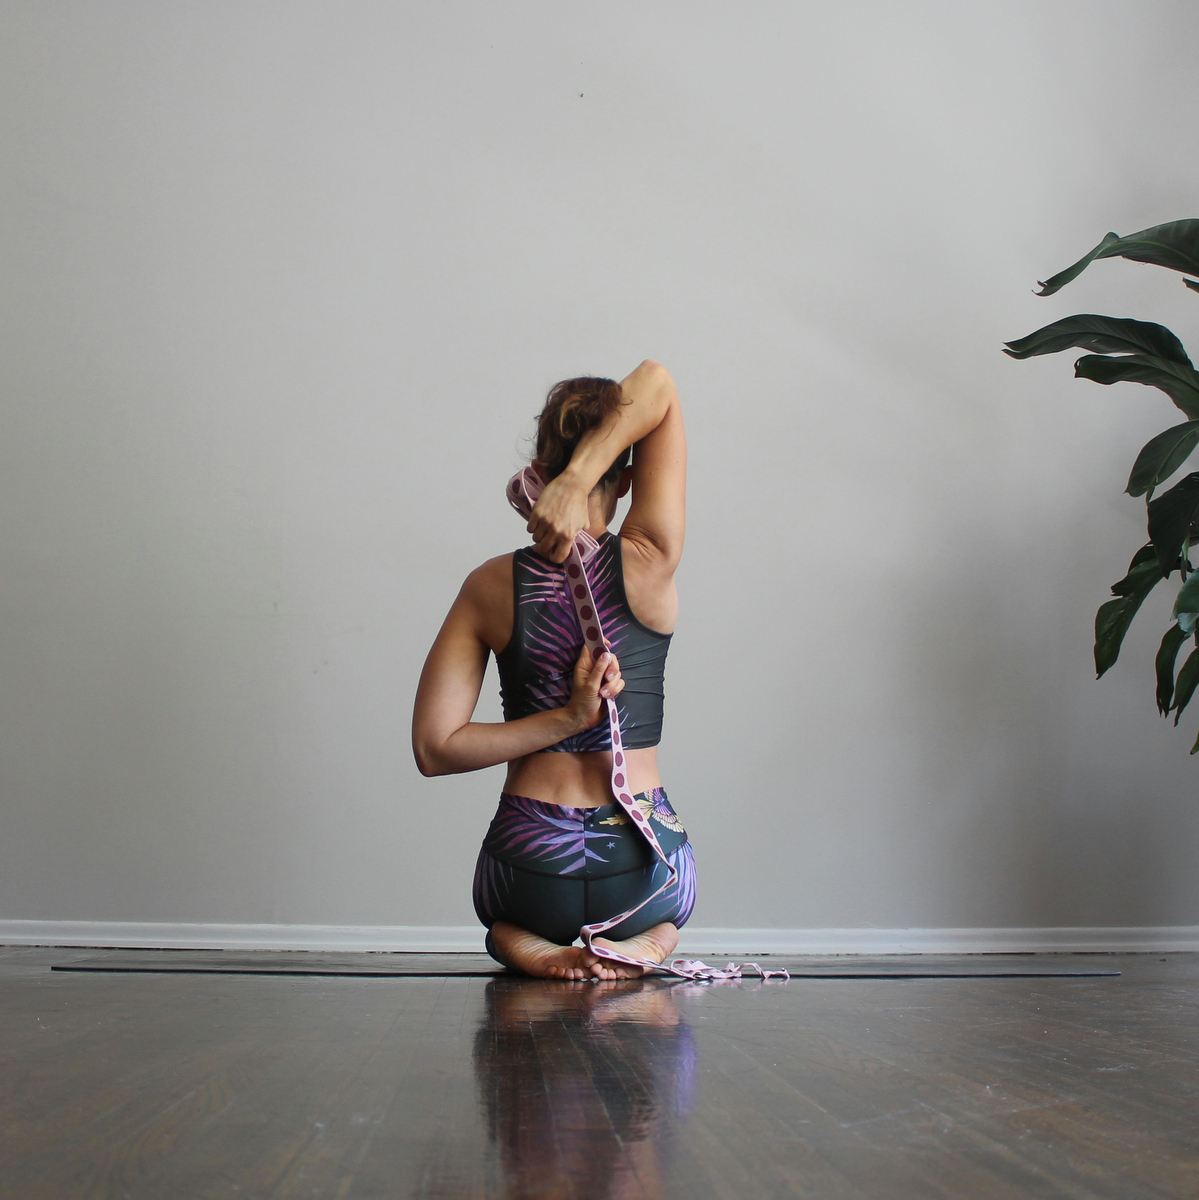
Gomukhasana Arms using a Strap